
How to Grow Tomatoes in a 5-Gallon Bucket: A Complete Guide
Growing tomatoes in a 5-gallon bucket is a great solution for anyone with limited space, whether you’re working with a small patio, balcony, or even an indoor space with adequate light. Container gardening, especially using a 5-gallon bucket, provides an excellent way to cultivate fresh tomatoes right at home.
In this step-by-step guide, we’ll walk you through the entire process of setting up your bucket, planting, and caring for your tomato plant, ensuring a successful harvest.
Step 1: Choose the Right Bucket
The first step to growing tomatoes in a 5-gallon bucket is selecting the right container. A 5-gallon bucket is ideal because it provides enough space for the roots to grow and allows you to manage the plant’s water needs effectively. Make sure the bucket is clean and free of any chemicals. You’ll also want to use a bucket that is made from food-safe plastic.
While any 5-gallon bucket works, it’s important to remember that the more durable and UV-resistant the material, the longer it will last in the sun. A standard plastic bucket should suffice if you plan to keep it outdoors.
Step 2: Drill Drainage Holes
Tomato plants need well-drained soil to thrive. Excess moisture trapped in the bucket can lead to root rot, which can harm or kill your plant. To prevent this, drilling drainage holes in the bottom of the bucket is critical. Use a drill to create 4 to 6 holes, each about 1/4 inch in diameter. These holes will allow excess water to drain out, keeping the soil from becoming waterlogged and ensuring healthy root development.
Additionally, adding a few smaller holes near the top of the bucket’s sides can help prevent water from pooling at the top, giving your plant better access to moisture as it grows.
Step 3: Add a Layer of Gravel for Drainage
After drilling drainage holes, the next step is to add a layer of gravel or small stones at the bottom of the bucket. A 2-3 inch layer of gravel will provide an additional drainage layer and prevent the soil from blocking the holes. This step is essential for improving drainage and preventing soil compaction.
The gravel also helps protect the roots from sitting in stagnant water, which can lead to diseases. It’s an easy step that makes a big difference in the long-term health of your tomato plant.
Step 4: Fill with High-Quality Potting Soil
Now that the bucket is ready, you’ll need to add high-quality potting soil. Avoid using garden soil, as it’s typically too dense for containers and doesn’t provide the necessary drainage that tomatoes need. Instead, opt for a well-draining potting mix, preferably one designed for vegetables or tomatoes.
Fill the bucket with soil, leaving about 2 inches of space from the top. This space is important for watering your plant without the soil spilling over. Tomatoes need loose, nutrient-rich soil that allows the roots to spread out easily, so make sure the soil is light and airy, not compacted.
Step 5: Plant the Tomato Seedling
When choosing a tomato variety, opt for a compact, determinate (bush) type of tomato that fits well in containers. Indeterminate types (vining tomatoes) grow too large for a 5-gallon bucket and require more space for proper root development.
When planting, dig a hole in the soil deep enough to accommodate the root ball of your tomato seedling. A common practice with tomatoes is to plant them deeper than they were in their original container. You can bury part of the stem to encourage the development of additional roots along the stem. This increases the plant’s overall strength and support.
Gently remove the plant from its nursery container and place it into the hole, then cover it with soil, pressing down gently to eliminate air pockets. Leave a small amount of space at the top of the bucket for watering.
Step 6: Water the Plant Thoroughly
Tomatoes need consistent watering to grow well, but they don’t like sitting in waterlogged soil. After planting, water the soil thoroughly until water begins to drain out of the holes at the bottom. This initial deep watering encourages the plant to establish its root system.
After this, water your plant when the top 1-2 inches of soil feel dry to the touch. Ensure that you water deeply but infrequently to encourage strong root development. A deep watering will allow the roots to reach down for moisture, while frequent, shallow watering can lead to weak roots.
Step 7: Provide Support with a Tomato Cage or Stake
Tomatoes can grow quite large, and their branches need support to prevent them from breaking under the weight of the fruit. A tomato cage or stake will provide the necessary support throughout the growing season.
Place the cage or stake in the bucket when you plant the seedling. If you wait until the plant has already started growing, you risk disturbing the roots. As the plant grows, gently tie the stems to the stake or cage, using soft twine or garden clips. This keeps the plant upright and allows for better air circulation, reducing the risk of diseases like mildew.
Step 8: Prune and Maintain the Plant
As your tomato plant grows, you’ll need to prune it to keep it healthy and productive. Pruning involves removing dead or yellowing leaves and cutting off “suckers” (the small shoots that grow between the stem and the branches). Pruning suckers helps the plant focus its energy on producing fruit rather than excess foliage.
You should also remove any leaves that are touching the soil, as they can promote disease. Regular pruning will help improve air circulation, reduce the risk of fungal infections, and encourage more energy to be directed into fruit production.
Step 9: Fertilize the Plant
Tomatoes are heavy feeders, so they will benefit from regular fertilization. Use a balanced, water-soluble fertilizer every two weeks or so, or follow the instructions on the specific fertilizer you’re using. You can also add slow-release fertilizer to the soil at the beginning of the growing season to provide continuous nutrition.
Tomatoes benefit from fertilizers that are higher in potassium and phosphorus, as these nutrients help promote fruiting and overall plant health.
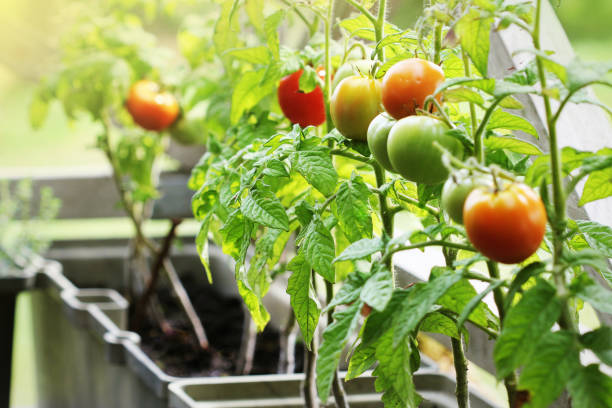
Step 10: Harvesting the Tomatoes
Tomatoes typically take anywhere from 50 to 85 days to reach full maturity, depending on the variety. Harvest them when they are fully ripe, which usually means they’ve reached their full color (red, yellow, or even purple, depending on the variety).
To harvest, gently twist or cut the tomato off the vine to avoid damaging the plant. It’s important to pick tomatoes regularly to encourage continued fruit production throughout the growing season.
Final Tips for Growing Tomatoes in a 5-Gallon Bucket:
- Sunlight: Tomatoes need at least 6-8 hours of direct sunlight each day to thrive. Make sure your bucket is placed in a spot that gets plenty of sun, whether it’s outdoors on a patio or in a sunny window if you’re growing indoors.
- Temperature: Tomatoes grow best in temperatures between 70-85°F (21-29°C). Protect your plant from extreme heat or frost, as tomatoes are sensitive to temperature changes.
- Pest Management: Keep an eye out for pests like aphids, caterpillars, or spider mites. If you notice any, remove them by hand or use an organic pesticide.
Growing tomatoes in a 5-gallon bucket is a simple and rewarding gardening method, providing you with fresh, flavorful tomatoes all season long. By following these steps—proper drainage, good soil, consistent watering, and regular pruning—you’ll enjoy a successful harvest from your container garden.


